The first thing every salon owner does after registering with Minuvox is set up the basics: company name and contact details, branding for invoices, and weekly hours. This takes about ten minutes if you have your tax IDs and a logo image ready.
This guide walks through both settings pages, explains what each field is for, and notes the few things that catch people out the first time.
Where to Find the Settings
Minuvox splits company setup across two pages. There is a small reason for this: one page holds the day-to-day operational settings every staff member touches, and the other holds the invoice-specific business profile that only the company owner manages. Knowing which page is which saves time later.
Preferences (/booking/preferences/) is the operational page. It holds your company name, contact email and phone, address, regional settings (timezone, currency, locale), and your weekly business hours.
Billing Settings (/booking/settings/billing/) is the invoice profile page. It holds your legal business name, tax IDs, structured billing address, logo, invoice footer text, and payment instructions.
Preferences is accessible to anyone with a staff login on your account. Billing Settings is owner-only – if a staff member tries to open it, they will see a permission error. The logo lives on the Billing Settings page because the logo is part of the invoice profile, not the operational profile.
Filling in Your Company Profile
Open the Preferences page and start at the top.

Name, email, and phone are the basics. The name appears throughout the app and on emails sent from the system. The email is your contact email, and the phone is the number you would put on a business card. None of these fields are validated against external services – type whatever your business uses.
Address is a single textarea, not a structured address. This is your operational address: where the salon actually is. If your registered office is somewhere different (an accountant’s address, a home office for a registered company), you will enter that separately on the Billing Settings page later.
Timezone controls how booking times display for your staff. If you are in South Africa, leave it on the default Africa/Johannesburg. If you are anywhere else, change it to your local timezone. Get this right before you create any bookings – it controls how every appointment time is interpreted.
Currency and region default to South African values (ZAR, en_ZA) because that is Minuvox’s home market, but you can change them at any time. The currency is what shows up next to invoice totals; the region controls things like date formatting and number formatting.
The page also has tax rate and invoice number prefix fields, plus a few advanced sections for booking policies, notification settings, and calendar defaults. You can leave the advanced sections on their defaults for now and come back to them once you have a few real bookings to test against.
When you save the page, every field change is recorded in Minuvox’s audit log. If you ever wonder when something was changed or by whom, the audit log has the answer.
Setting Your Weekly Business Hours
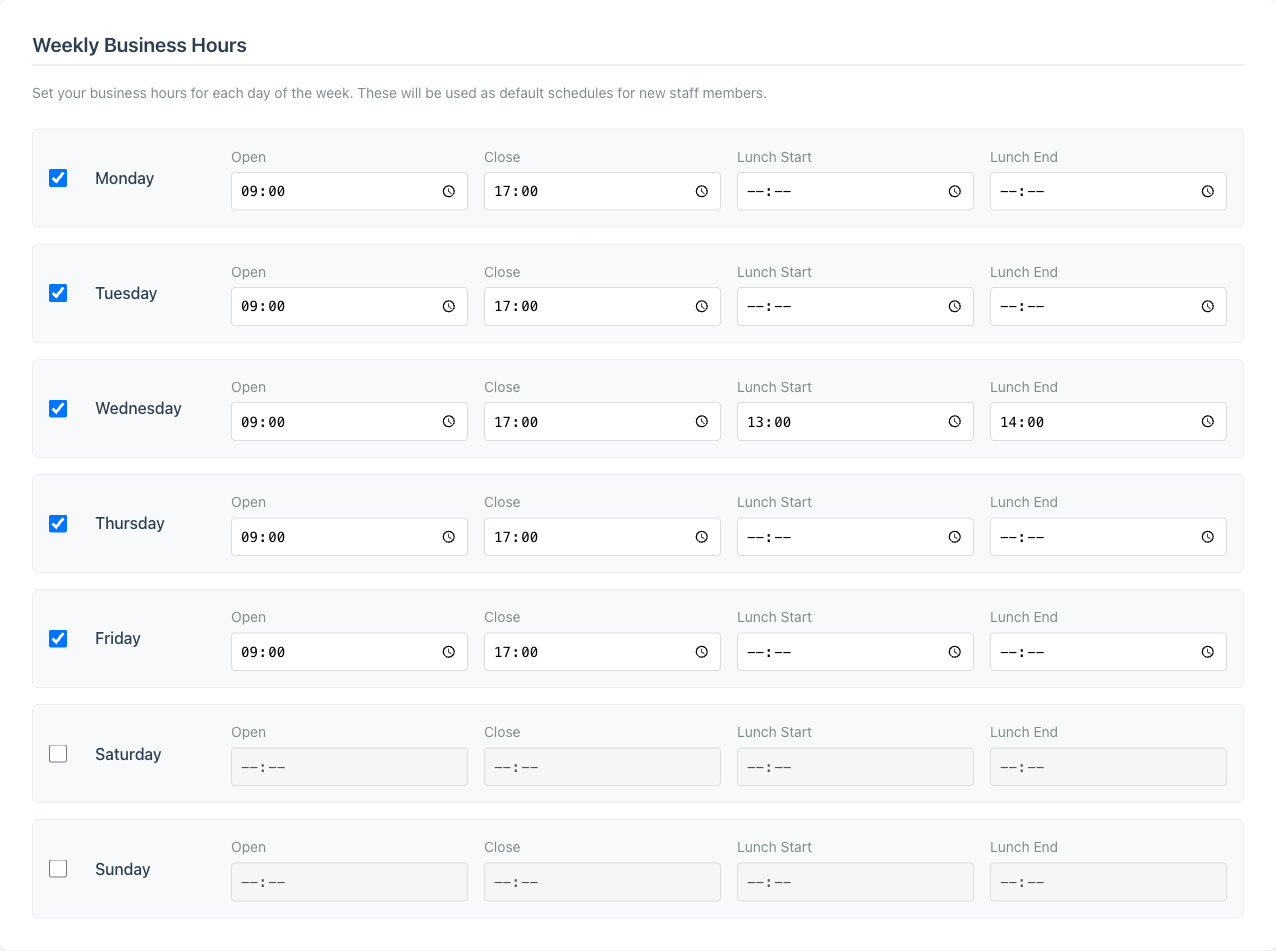
The same Preferences page has a per-day schedule for each of the seven days of the week. For each day you can set whether you are open, the start and end times, and an optional lunch break.
The defaults are 09:00 to 17:00, Monday through Friday, with no lunch break. Adjust each day to match your actual hours. If you are closed on Sundays, untick “Open” for Sunday. If you take a lunch break from 13:00 to 14:00, fill in the lunch fields for the days you take it.
These hours do two related jobs in Minuvox, and it is worth knowing both before you save the page.
1. They are the baseline for new staff schedules. When you add a staff member, the company hours give you a sensible starting point for that person’s personal weekly schedule – you do not have to retype the same opening and closing times for every team member.
2. They are the fallback enforcement for any day where a staff member has not set their own schedule. If a stylist has no personal schedule entry for Sunday, then an attempt to book that stylist on a Sunday is checked against the company schedule for Sunday. If Sunday is marked closed on the company schedule, or the booking time falls outside the company’s start and end, or overlaps the company’s lunch break, the booking is rejected with a message along the lines of “[staff name] is not available from HH:MM to HH:MM.”
This second point is the part that catches people out. The company hours are not just decoration. For any staff member who has not been individually scheduled, the company hours are the rule.
Once a staff member has a personal weekly schedule for a given day, that schedule takes over. If you give a particular stylist a personal Sunday schedule with hours of their own, the company’s “closed Sunday” no longer applies to them. The personal schedule wins for the days it covers, and the company schedule takes over only for the days where the staff member has no personal entry.
In practice, the workflow is: get the company hours right first because they are your business default and your safety net, then set up each staff member’s personal weekly schedule and adjust per-staff where the hours genuinely differ. Staff members who work the standard company hours can usually be left without per-day overrides; staff with unusual hours need their own schedule.
A few things Minuvox does not do here, in the interest of being upfront:
- No multi-location support. One company in Minuvox means one set of company hours. If you run two locations with different hours, you currently need to manage them as one combined schedule.
- No closed-dates or holiday management. The hours are a weekly recurring schedule. There is no “we are closed December 24-26” override – you would handle that by creating staff time-off entries or by leaving those slots unbooked.
- No public-facing display. The hours are internal: a default for new staff schedules and a backstop for unscheduled days. Clients do not see them anywhere, because Minuvox is staff-initiated booking – there is no public booking portal where hours would be exposed.
Uploading Your Logo and Invoice Profile
Now switch to Billing Settings (/booking/settings/billing/). This page holds the invoice profile: everything that needs to appear on a properly-formatted invoice.
Legal business name is the official registered name of your company, which often differs from the trading name on the Preferences page. If you trade as “Sarah’s Salon” but your registered company is “Sarah Cohen Hair Studio (Pty) Ltd,” the legal name goes here and shows up on invoices when formality is required.
Tax IDs are flexible. Minuvox gives you two slots, each with a custom label and a value. Set the label to whatever your country uses – VAT Number, EIN, GST, CIF, ABN, NIF – and the value to the actual number. The second slot is optional for the case where you need to print two identifiers (for example, a national tax ID plus a regional one). The custom labels mean Minuvox does not assume any specific country’s tax system.
Billing address is the structured version: street line 1, optional line 2, city, state or province, postal code, and ISO country code. This is the address that prints on invoices, separate from the free-text operational address you set on the Preferences page. Use the registered office or accounting address here if it differs from your salon location.
Logo is where the branding lives. Upload a PNG, JPEG, or WEBP image up to 500KB. Minuvox validates the file type and size when you upload, so if your image is too large or in the wrong format you will see an error before saving. Once uploaded, the logo appears at the top of every invoice you generate – no extra steps to attach it per invoice.
Invoice footer text is for legal disclaimers, payment terms, or any standing message you want at the bottom of every invoice. Common uses are payment terms (“Payment due within 14 days”), legal disclaimers (“Prices include 15% VAT”), or contact lines (“Questions? email [email protected]”).
Payment instructions is the place for bank details, IBAN, SWIFT codes, or any other payment information clients need to settle their bill. This block also prints on each invoice.
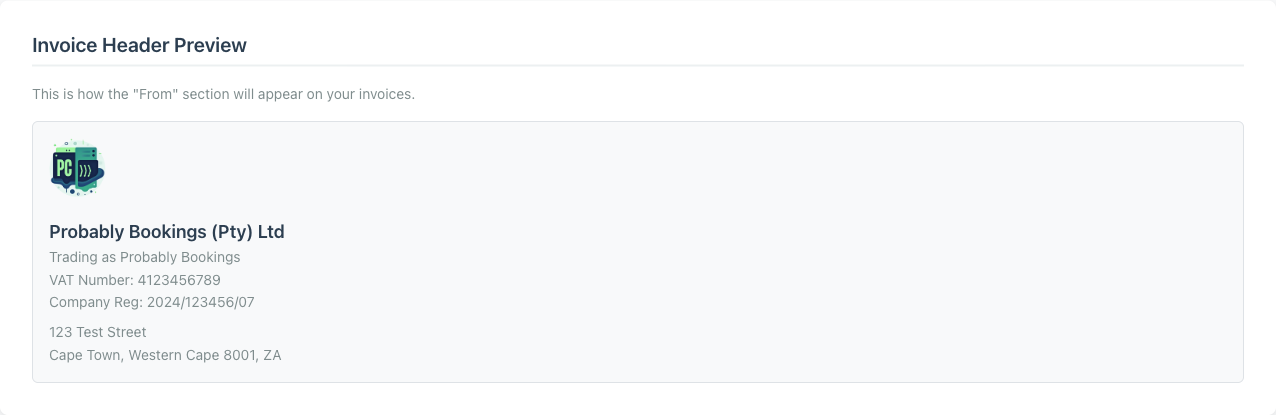
Save the page and your invoice profile is locked in. The Billing Settings page also shows an Invoice Header Preview at the bottom – the same logo, legal name, tax IDs, and billing address rendered in the layout that prints on every invoice. If something looks wrong in the preview, fix it on the form above and save again.
A Note on Logos and File Privacy
A small technical note that matters more than it sounds.
Minuvox stores logos on Cloudflare R2 (a private storage bucket) and serves them through a tenant-isolated proxy at /media/company-logo/<your-company-id>/. What that means in plain language: your logo file is not on a public URL. It can only be fetched by users who are logged into your Minuvox account. Other companies on Minuvox cannot see your logo, and a random visitor cannot guess the URL.
There is one design choice worth knowing about. Minuvox never deletes old logo files. If you upload a new logo, the old file stays in storage. The reason is that past invoices reference the logo that was active when they were issued. If we deleted old files, an invoice you sent six months ago would suddenly show a broken image. Keeping old files preserves historical accuracy for invoices that have already been delivered. The trade-off is that storage usage grows slightly with each logo update – but logos are small files and this is a fair trade for invoice integrity.
If you upload three logos over a year, your three most recent invoices will show three different logos in the right historical order. The current invoice template will always use the current logo.
What to Do Next
Once your company profile, business hours, and invoice profile are in place, the next setup steps are:
- Add your staff. Staff Scheduling for Small Service Businesses walks through adding team members and assigning services.
- Set up your services and pricing. Service categories and per-service pricing form the catalogue your team books from.
- Create your first booking. How to Set Up Online Booking for Your Salon covers the broader setup walkthrough including the calendar.
- Generate your first invoice. How to Create Professional Invoices for a Service Business shows how the invoice profile fields you just configured come together on a real invoice.
Each of these is its own short setup task. You do not have to do them all in one sitting – come back when you are ready.
Ten Minutes Now Saves Hours Later
Setting up the company profile is a one-time task that pays off every time you generate an invoice or add a new staff member. The hardest part is having your tax IDs and a logo file ready – the typing is straightforward.
If you keep your information consistent across the two pages, your invoices look professional from day one and your team has the right defaults to work from. You can also explore the full feature set at no cost.
About the author: Adam Claassens is the founder and developer of Minuvox. He designed and built the Preferences and Billing Settings pages walked through in this article, which is why the steps here match how the product actually behaves. Minuvox exists to make professional booking tools accessible to small service businesses that cannot afford expensive monthly subscriptions.
This article was drafted with AI assistance and reviewed, fact-checked, and edited by the Minuvox team.