You probably have client phone numbers saved in your contacts and colour formulas written in a notebook. Maybe there is an allergy note on a sticky note by the till. The problem is that none of this is connected – not to each other, and not to the bookings you have made for those clients.
A purpose-built client database changes that. When a client’s name, contact details, preferences, and billing information all live in the same place – and that place is the same system where you create bookings and invoices – you stop losing information and start using it.
This guide covers salon client management in Minuvox from start to finish. You will learn how to add clients, record notes and preferences, set up billing details for business clients, find anyone on your list in seconds, and import existing clients from a spreadsheet. If you have not set up your Minuvox account yet, start with How to Set Up Online Booking for Your Salon – that guide covers registration, services, staff, and your first booking.
Adding Your First Client
Click Clients in the left sidebar, then click + Add Client.
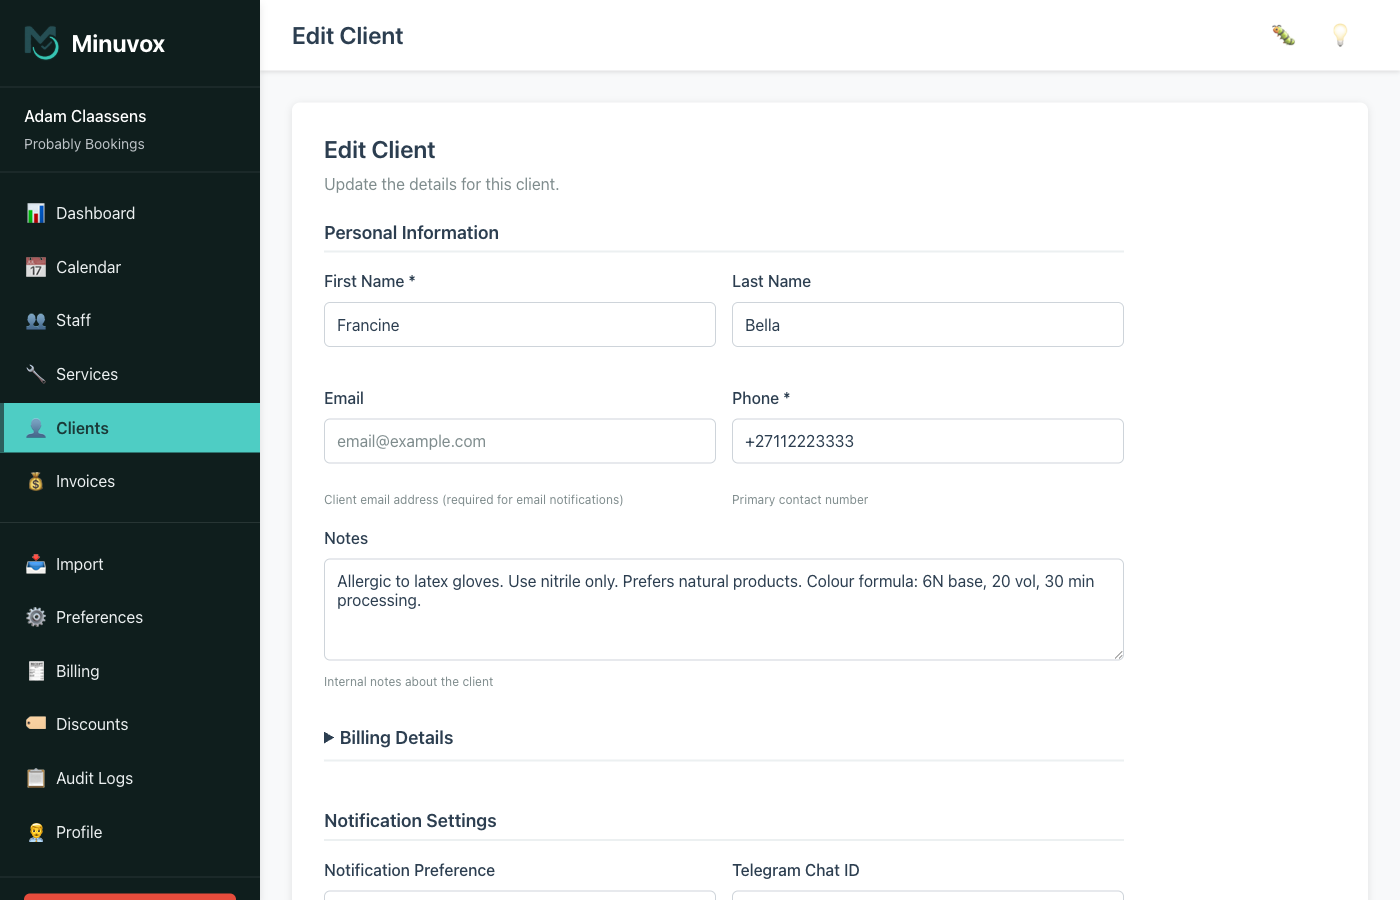
The client form has four sections. For most clients you only need to fill in the first one.
Personal Information
- First Name – required
- Last Name – optional, but recommended so you can tell apart two clients named “Sarah”
- Email – optional. If you enter one, it must be unique within your company. Leave it blank for walk-in clients who do not provide one.
- Phone – required. This is how most salons contact their clients.
- Notes – a free-text area for anything you want to remember about this client. More on this in the next section.
Below Personal Information, the form has a Billing Details section (collapsed by default), a Notification Settings section, and a Status checkbox. You can skip all of these for now and come back later.
Click Create Client and the client appears in your list.
About notification settings: The form includes a Notification Preference field (Email, Telegram, or No Notifications) where you can record how each client prefers to be contacted. This is a reference for your own use – Minuvox does not currently send automated notifications to clients.
Recording Client Notes and Preferences
A phone number tells you how to reach someone. Notes tell you how to serve them well. Here are some examples of what salon staff record:
- Allergies: “Allergic to latex gloves. Use nitrile only.”
- Colour formulas: “6N base, 20 vol, 30 min processing.”
- Product preferences: “Prefers sulphate-free shampoo.”
- Scheduling habits: “Works shifts – only available weekday mornings.”
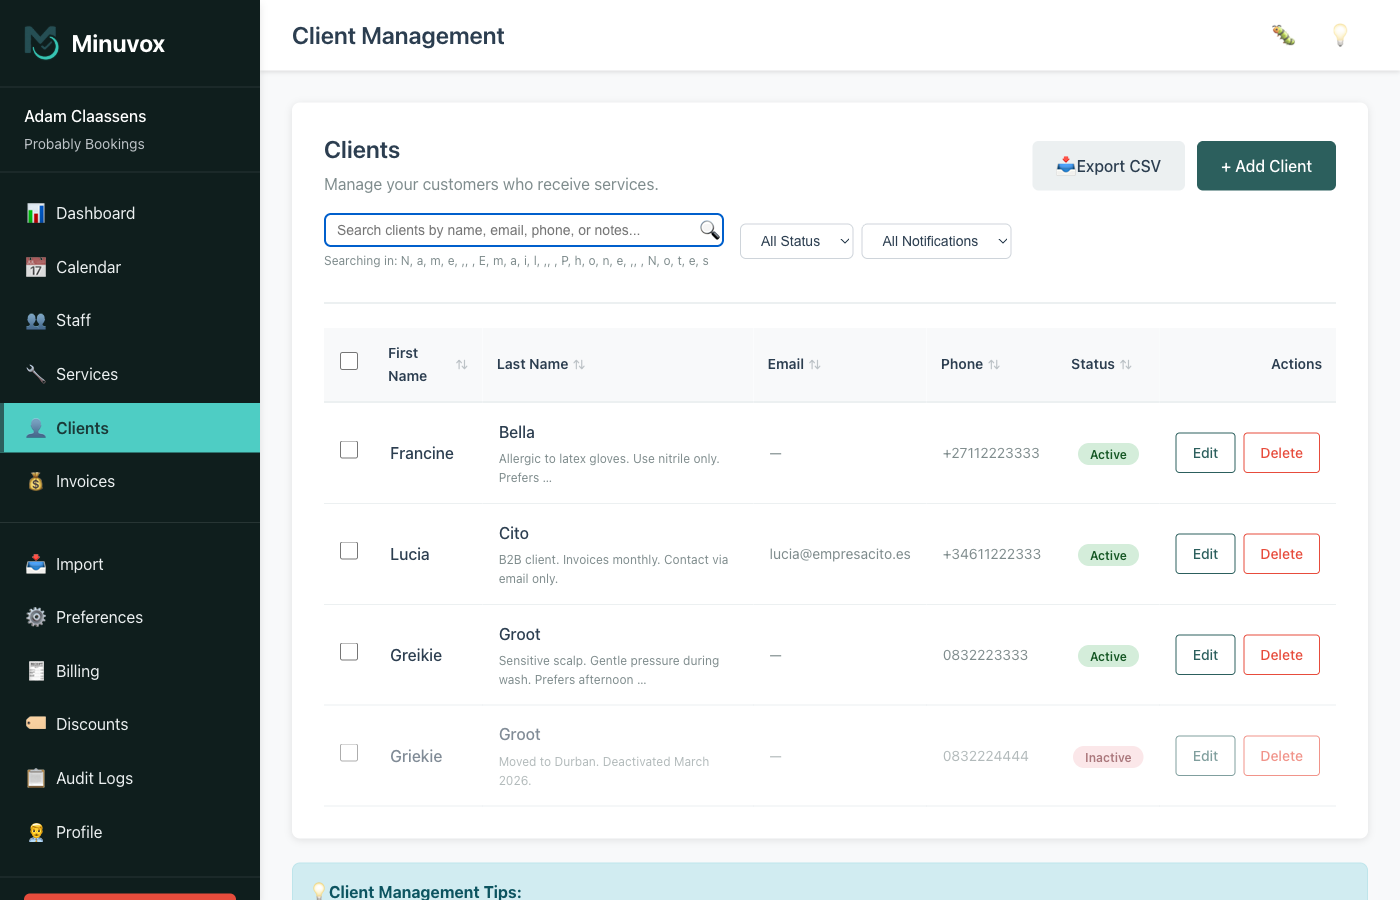
Notes are visible in two places: a truncated preview under the client’s last name in the client list, and the full text on the edit page.
Tip: Pick a consistent format across your team. A pattern like “Allergy:”, “Formula:”, “Preference:” at the start of each note makes the list easier to scan.
Billing Details for Business Clients
Most salon clients are individuals – name, phone, and maybe an email is enough. But if you invoice businesses, you need more.
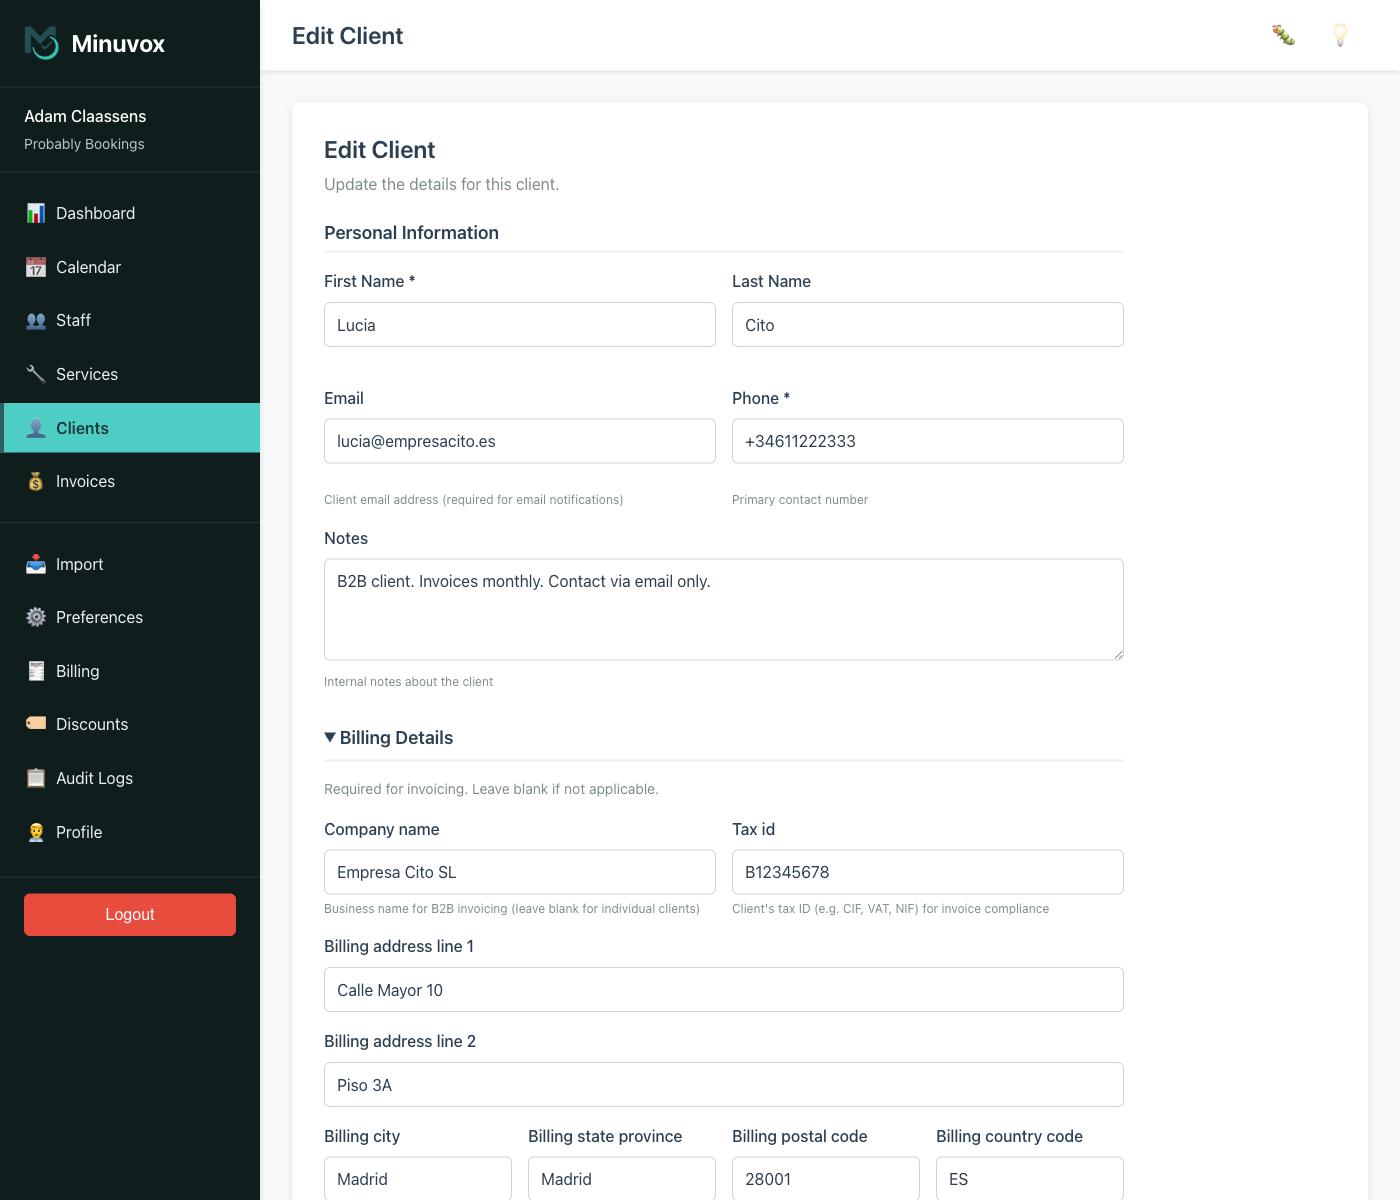
The Billing Details section of the client form is collapsed by default. Click it to expand, and you will see:
- Company Name – the business name for the invoice
- Tax ID – their tax identification number (VAT, CIF, NIF, or whatever applies in your region)
- Billing Address – two address lines, city, state or province, postal code, and country code (a two-letter code like ZA, GB, or US)
These fields are all optional. Leave them blank for individual clients.
How billing details connect to invoices: When you create an invoice, Minuvox snapshots the client’s billing details onto it at that moment. If you update the client’s details later, existing invoices are not changed – they reflect what was on file when the invoice was created. Fill in billing details before creating invoices, not after.
For more on the invoicing workflow, see How to Create Professional Invoices for a Service Business.
Finding Clients Fast
Once your client list grows, you need to find people quickly.
Search
The search bar at the top of the client list searches across name, email, phone, and notes simultaneously. Type a name, a phone number, or a word from a client’s notes – it checks all fields at once.
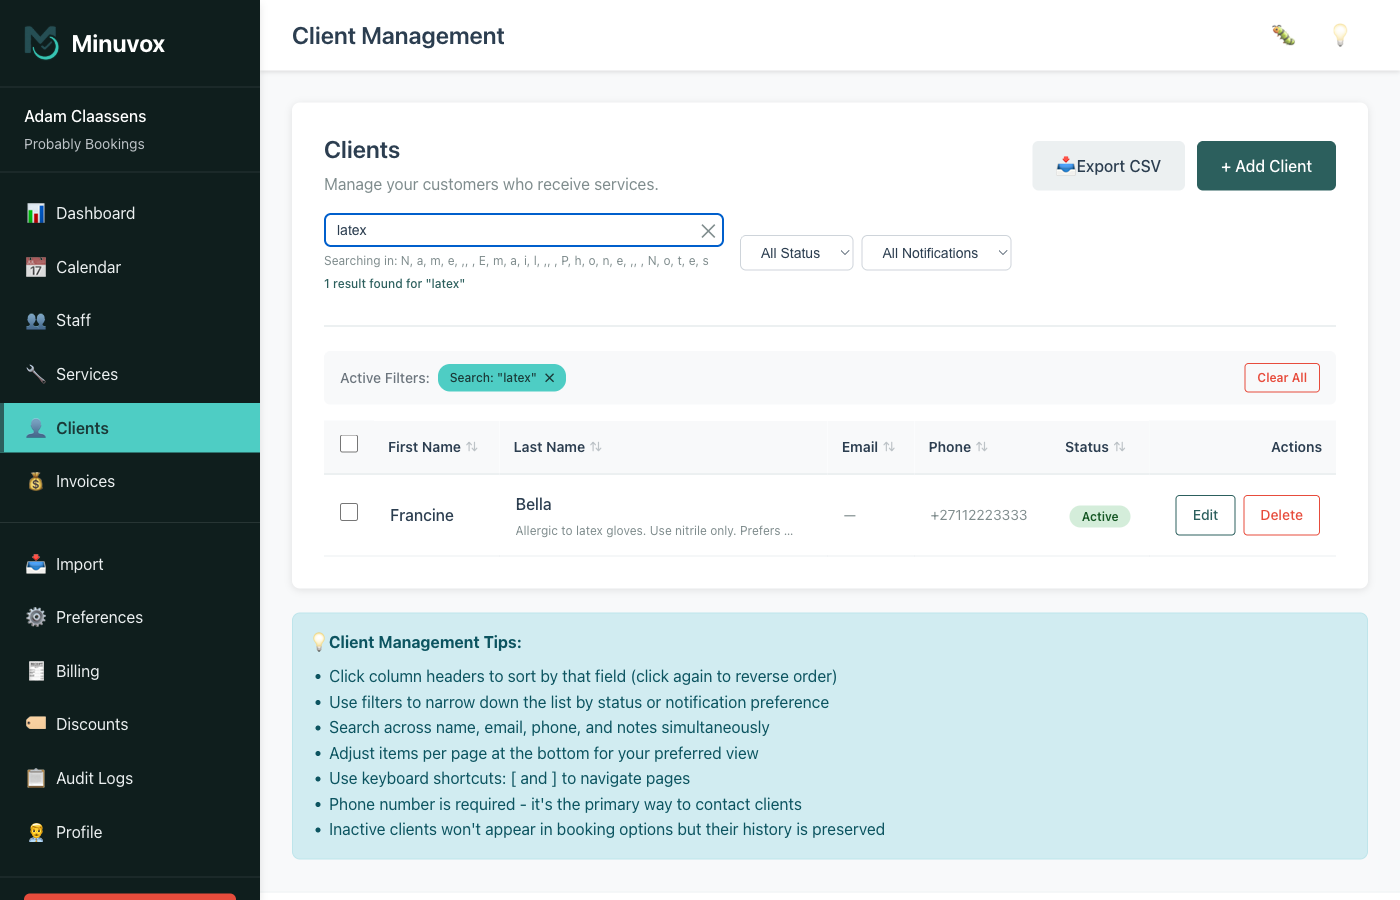
Filters
Two dropdown filters sit next to the search bar:
- Status – show All clients, only Active, or only Inactive
- Notification Preference – filter by Email, Telegram, or None
Active filters appear as tags below the search bar so you can clear them with one click.
Sorting and Pagination
Every column header is sortable – click to sort, click again to reverse. Below the table, choose how many clients to show per page (10, 20, 50, or 100) and use the [ and ] keys to move between pages.
Editing, Deactivating, and Deleting Clients
Each client in the list has two action buttons: Edit and Delete.
Editing
Click Edit to open the client form with their current details. Change what you need and click Update Client. Every field – notes, billing details, status – is editable.
Deactivating
To stop a client from appearing in booking options without losing their record, edit the client and untick the Active checkbox. Inactive clients stay in your client list (greyed out) and their past bookings are unaffected, but they will not show up when you create a new booking.
Deleting
Click Delete to permanently remove a client. Minuvox shows a confirmation page with a warning that this cannot be undone, and suggests marking the client as inactive instead.
Deleting a client who has invoices is not possible – you will need to deactivate them instead. This protects your financial records.
When in doubt, deactivate. Deletion is permanent. Deactivation is reversible – edit the profile and tick Active again any time.
Importing Clients from a Spreadsheet
If you have an existing client list in a spreadsheet, you do not need to type each person in one by one. Click Import in the left sidebar and upload a CSV file (a spreadsheet format most apps can export) under the Clients section.
Your CSV needs these columns:
| Column | Required | Notes |
|---|---|---|
| first_name | Yes | Client’s first name |
| last_name | Yes | Client’s last name |
| phone | Yes | Phone number |
| No | Must be valid format; duplicates rejected | |
| notification_preference | No | “email”, “telegram”, or “none” (defaults to “email”) |
| notes | No | Free text |
| is_active | No | “true” or “false” (defaults to true) |
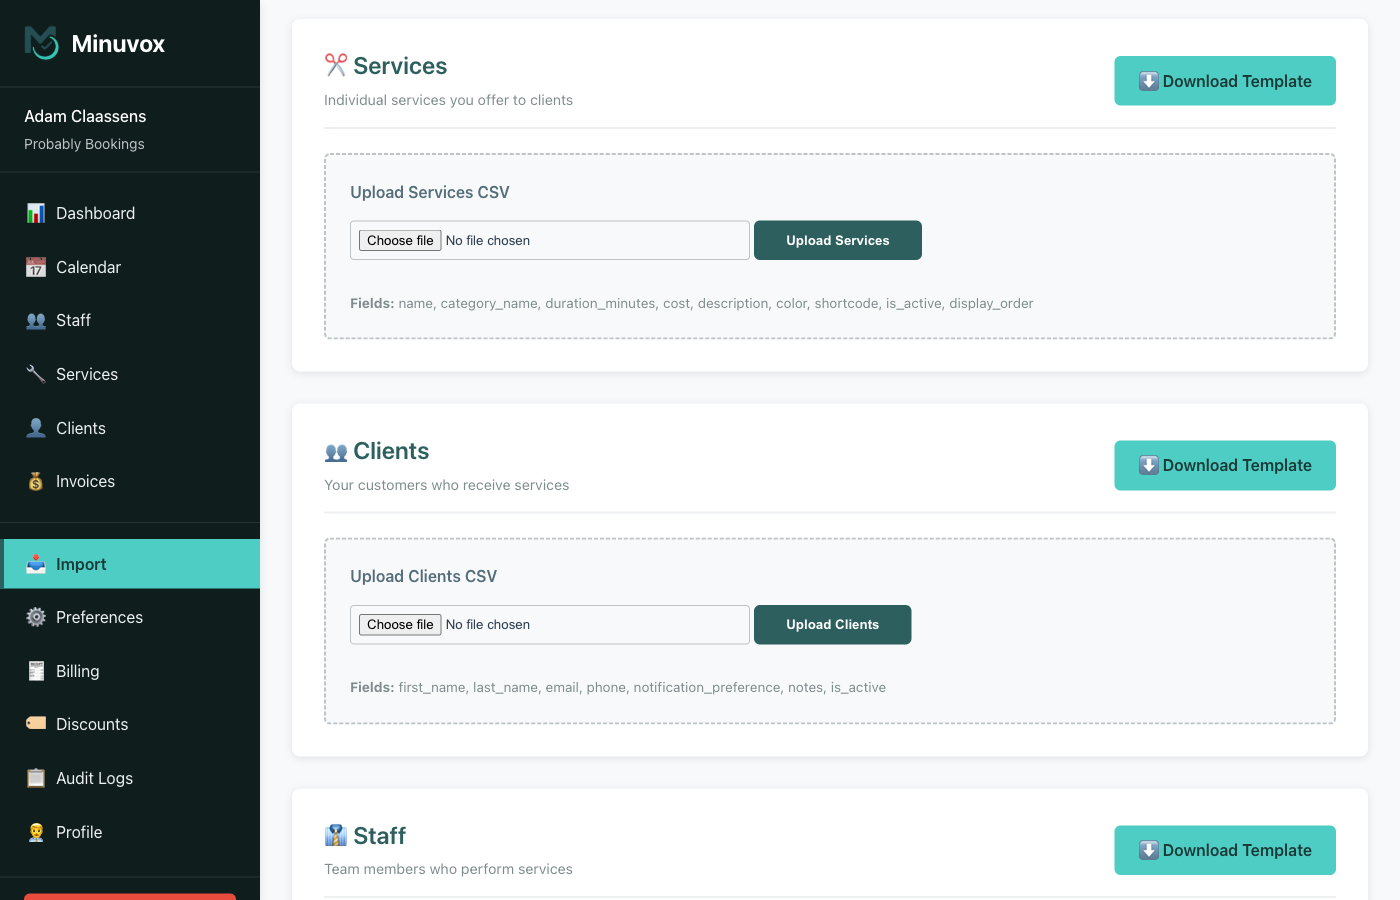
Rows with duplicate emails are skipped with an error message; the rest of the file still imports. Make sure your column headers match the names above exactly.
Quick Client Creation During Booking
When a walk-in client arrives and they are not in your system, you do not have to leave the booking form to add them.
Click + Book on a time slot in the Calendar. The booking form includes a quick-create option for clients – fill in a first name and phone number (last name and email are optional), and Minuvox creates the client record and selects them for the booking in one step. You can go back to their full record later and add notes or billing details.
How Clients Connect to the Rest of Minuvox
Every client you add becomes available across Minuvox – in booking forms, on invoices, and in your audit trail. Here is how those connections work.
Bookings: When you create a booking, you select a client for each service. The booking records which client received which service, from which staff member, at what time. (If you are still setting up your service list, see How to Organise Your Services with Categories and Pricing.)
Invoices: Billing details are snapshotted onto invoices at creation time. If you edit a client’s billing details later, existing invoices keep the original values.
Audit logs: Client creates, updates, and deletes are recorded in Audit Logs in the sidebar, showing who made the change and when.
Keeping Your Client List Clean
A client database is only useful if you maintain it.
Review inactive clients periodically. Active clients with outdated phone numbers or missing notes are worth updating.
Use notes consistently. If your salon records colour formulas, make sure everyone writes them in the Notes field in a similar format. Information that only lives in one stylist’s memory is information you lose when that stylist leaves.
Keep phone numbers in a consistent format. Whether you use +27 82 123 4567 or 082 123 4567, pick one style and stick with it. This makes searching by phone number more reliable.
Fill in billing details before creating invoices. Since Minuvox snapshots billing details at invoice creation time, adding a client’s company name and tax ID after the invoice already exists will not update that invoice. Get the billing details right first.
Export your client list regularly. The Export CSV button on the Clients page downloads your current list. Keep a backup, especially before making bulk changes.
For a full list of what Minuvox offers, see the features overview.
Start Building Your Client Database
If you are new to Minuvox, start with How to Set Up Online Booking for Your Salon for the full setup walkthrough. Already set up? Open the Clients section in the sidebar and add your first client – or use the CSV import to bring in your existing list in one step.
About the author: Adam Claassens is the founder and developer of Minuvox. He built the platform to make professional booking tools accessible to small service businesses that cannot afford expensive monthly subscriptions.
This article was drafted with AI assistance and reviewed, fact-checked, and edited by the Minuvox team.